
Confirm that you own a site
Three ways to prove control, needed before statements and VPATs.
Accessibility statements and VPATs speak on behalf of a website, so they unlock only after you show that you control it. Scanning works without this step. You need to confirm a site once, and the confirmation does not expire.
Open the site, choose the Settings tab and find "Confirm site ownership". Any one of the three options is enough.
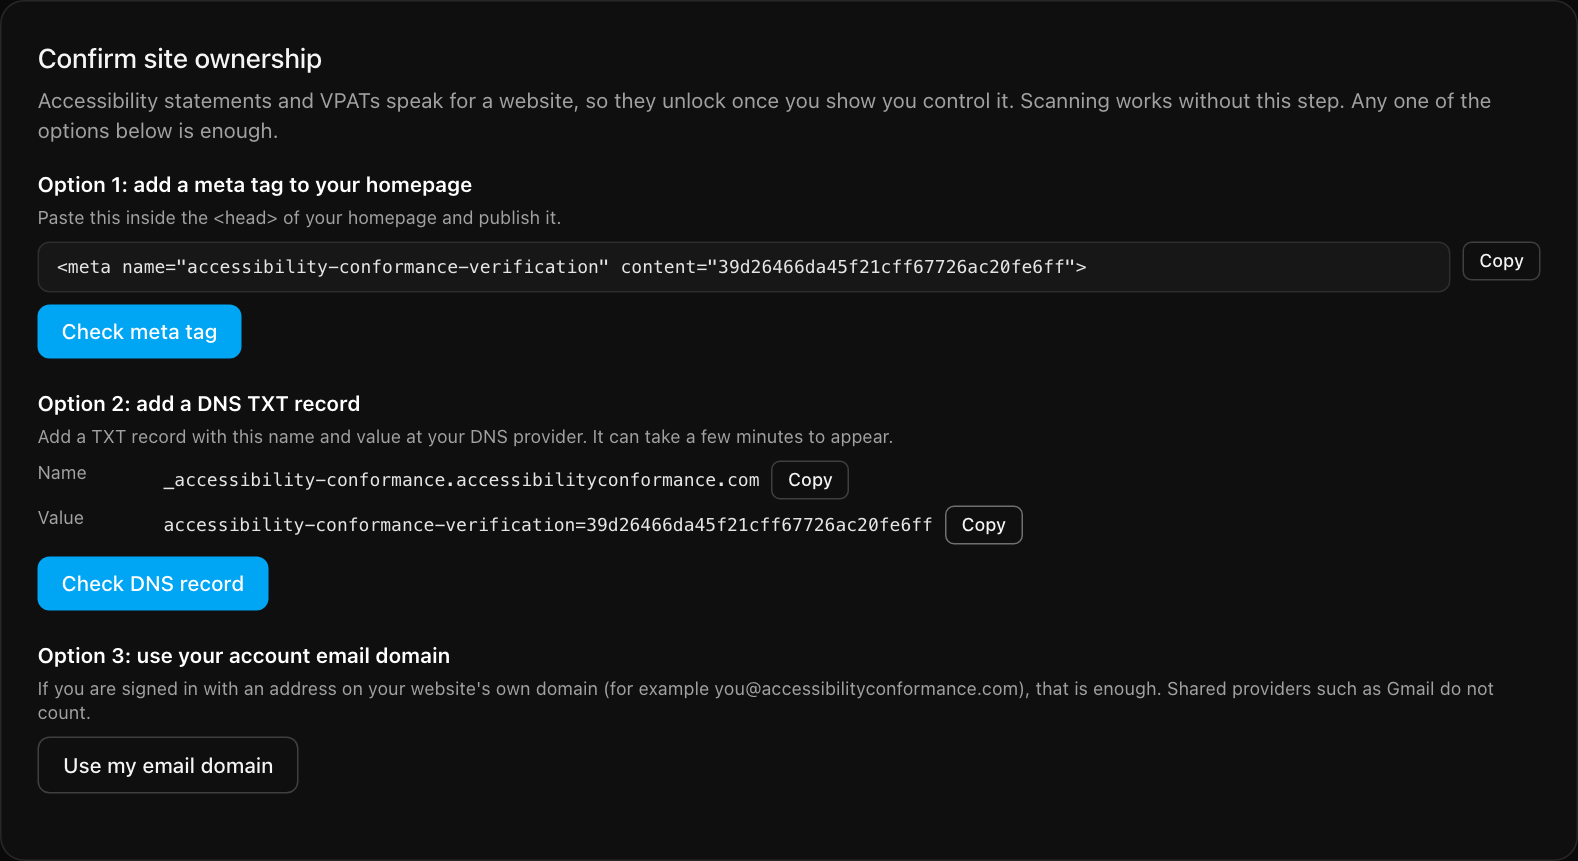
Option 1: add a meta tag
- Select Copy next to the
<meta>tag shown for your site. - Paste it inside the
<head>of your home page and publish the change. - Select Check meta tag.
The tag looks like this, with your own code at the end:
<meta name="accessibility-conformance-verification" content="your-code-here">The tag must be on the exact home page address you added, and it must be visible to the public. If you use a caching plugin or CDN, clear the cache after you publish.
Option 2: add a DNS TXT record
- Sign in to wherever your domain's DNS is managed, such as your registrar or Cloudflare.
- Add a TXT record using the name and value shown in the panel. Each has its own Copy button, so you can paste them straight into your DNS provider.
- Select Check DNS record. New records can take a few minutes to appear.
Option 3: use your account email domain
If you are signed in with an address on the website's own domain, for example you@example.com for
example.com, select Use my email domain. That counts as proof. Shared providers
such as Gmail do not count.
After you confirm
The "Confirm that you control this website first" message disappears from the VPAT and statement panels, and their buttons switch on if your plan includes them. See accessibility statements and VPAT / ACR.
Having trouble? The troubleshooting page covers the common reasons a check fails.
Still stuck? Contact us with your site address and what you expected to happen.